In this article we are writing in detail about installing and configuring the Java Development Kit(JDK), installing Eclipse IDE, downloading the Java client driver and configuring the Eclipse with selenium webdriver.
Table of Contents
Getting Started With Selenium WebDriver
Let’s use the following steps to set up the components for getting started with selenium webdriver and running your first selenium webdriver script on Java.
1. Download and Install Java Development Kit
Java Development Kit(JDK) is a prerequisite for running Eclipse IDE on your computer. So you have to install and configure it before running the Eclipse IDE.
You can download Java Development Kit(JDK) from oracle website as given below.
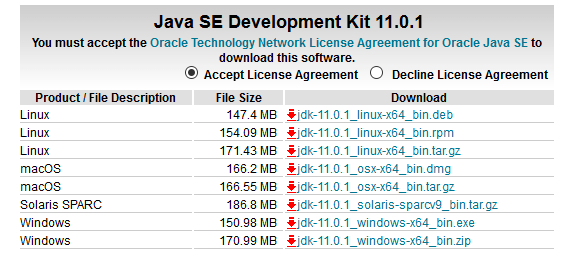
Here you have to select “Accept License Agreement” radio option and download the setup file for you OS. For installing on windows, you have to download ‘.exe’ file that is available for both 32-bit and 64-bit windows.
Now, install JDK on your computer going through the setup wizard. After successfully installing the JDK, you have to specify the path of the ‘bin’ folder on the environment variable. For this, you have to go to ‘Advanced system settings’ under ‘system’ from the control panel and have to click on ‘Environment variables’ button located under the advanced tab of system properties dialog box. You can edit the path variable and add the new path of ‘bin’ folder i.e. “C:\Program Files\Java\jdk-11.0.1\bin” from there.
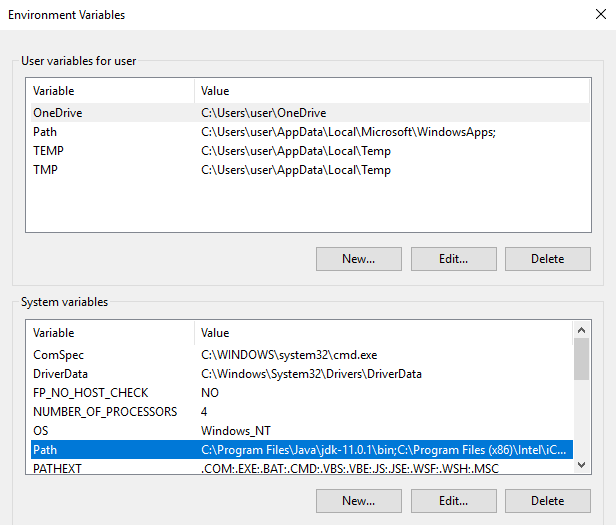
You can verify the installation and configuration of Java Development Kit(JDK) through command prompt. For this, go to command prompt, type ‘path’ and press enter then verify the presence of recently added path. You can also type the command ‘java -version’ for verifying the version of installed java.

2. Download and Install Eclipse IDE
After successfully installing and configuring the JDK on your computer, you have to download Eclipse IDE for Java developers from its website. For this, go to download page of Eclipse IDE for Java developers as shown on the image below.

Select the correct version of the Eclipse based on your OS.
When you have downloaded the zip file, extract it on the location from where you want to run the IDE. You can run the program simply double clicking on the “eclipse.exe” file going through the Eclipse folder.
3. Download Selenium Client Driver for Java
When you have completed installing Eclipse IDE on your computer, you have to download the selenium client driver file for Java and import it into Eclipse. You can download the selenium Java client driver file from the selenium website. Selenium client driver files for different languages like C#, Ruby, Python, etc. are also available there along with Java.

Once you have downloaded the “.zip” file, you have to extract it any of your desired location of your computer that will be easy to remember.
4. Create New Project and Class on Eclipse
After completing all the steps written above, you have to run the Eclipse IDE as given on step 2. When you have launched the Eclipse, you will get the new window for selecting a workspace. Provide the desired location i.e.” D:\selenium_workspace” where you want to store Eclipse projects.
Now, you have to create a new class under a new Java project. Use the following steps for creating a Java project at first.
- Go to the File menu from the menu bar.
- Click on New and then click on Java project.
- Provide the name of the project i.e.”selenium_project”.
- Now click on the finish button to complete creating a new project.
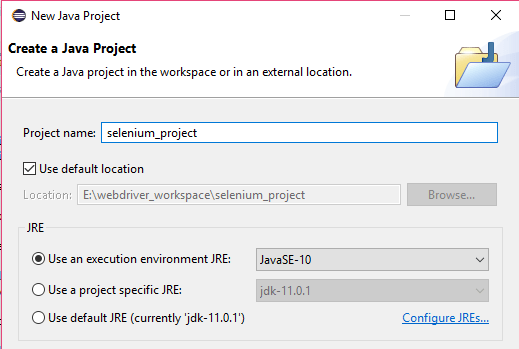
Use the following steps to create a new class after creating a Java project.
- Go to new project name i.e. “selenium_project” on package explorer window and click on it.
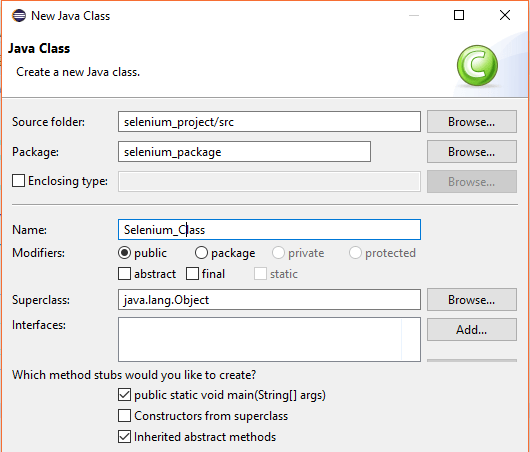
- Right click on “src” folder and click on class under new option.
- Provide the name of the package i.e. “selenium_package” on the package field.
- Give the name of the class i.e. “selenium_class” on the class name field.
- Now, give tick mark on “public static void main(string [] args)” as shown on the screenshot and click on finish button.
5. Import Selenium Client Driver on Eclipse
Now, import selenium client driver files on the newly created class from the previous step. Use the following steps in order to add JAR files included under the Java client driver folder.
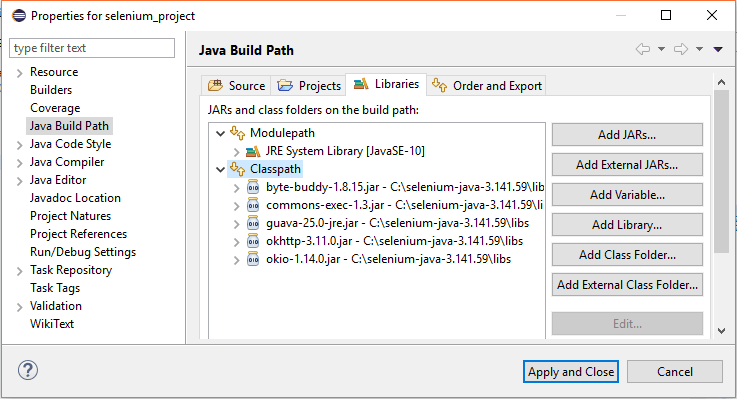
- At first, right click on the name of the project i.e.”selenium_project” and select properties option.
- Then, click on the “Java Build Path” option located on the left side of the properties window.
- Go to “Libraries” tab and click on the class name.
- Click on “Add External JARs…” button shown on the screenshot below and select all the JAR files included under Java Client Driver folder.
6. Create the First Selenium Webdriver Script
When you have completed all the steps written above, you will be ready to create your first selenium webdriver script. Write the following code on the newly created class under the new Java project. It will open the chrome browser and opens the provided URL. When the execution completed, it prints “Test Passed” on the console.
package selenium_package;
import org.openqa.selenium.WebDriver;
import org.openqa.selenium.chrome.ChromeDriver;

public class Selenium_Class {

public static void main(String[] args) {
WebDriver driver = new ChromeDriver();

// launch Chrome and direct it to the provided URL
driver.navigate().to("https://siteforinfotech.com/");

System.out.println("Test Passed!");

//close Chrome
driver.close();
		}
	}
If you want to learn more on writing advanced selenium webdriver scripts, read next post having sample selenium webdriver script written in Java for different browsers.


