TestNG is an open-source automation testing framework that was inspired by JUnit that uses annotations for managing test cases more efficiently. In TestNG, “NG” means Next Generation, so it was the testing framework built for the next generation that eliminates most of the limitations of the older testing frameworks like JUnit and NUnit. TestNG allows the testers to write more powerful and flexible tests than other testing frameworks.
Table of Contents
Why Use TestNG With Selenium WebDriver
Since Selenium WebDriver has some limitations for generating test results and managing and running the test. Using TestNG with Selenium WebDriver can overcome all the limitations of using default Selenium. Following are the most important features and advantages of using TestNG with Selenium.
- It can generate the test report in a proper format that includes all the details on how many test cases are passed, failed, and skipped after executing the test script.
- Since it supports using annotations(@), we can easily manage the test scripts and can set the priority for running the test cases.
- It introduces the test groups, so we can group multiple test cases by converting them into a testing.xml file.
- Due to its flexible run-time configuration feature, we can execute test cases multiple times without using loops.
How to Install TestNG in Eclipse IDE
There are two methods of installing TestNG in Eclipse for Selenium WebDriver: one is installing TestNG from the update site using the “Install New Software” option available on the help menu, and another method is installing from Eclipse Marketplace. Following is the step-by-step guide for installing TestNG in Eclipse IDE using different methods.
1. Install TestNG from the Update Site
Use the following steps to download and install TestNG in Eclipse from the update site.
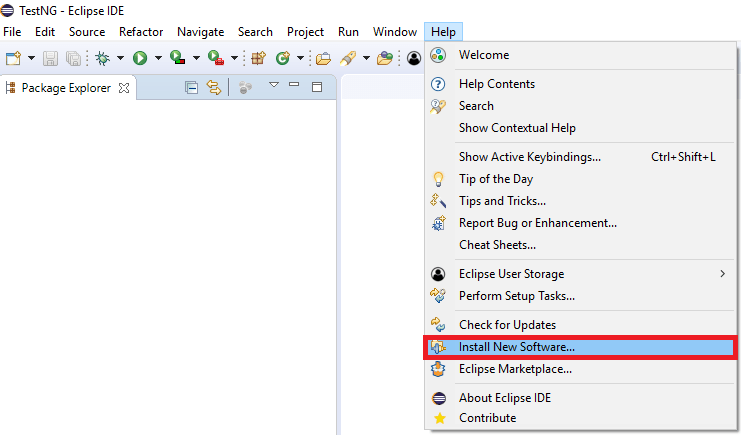
Step 1: Open Eclipse IDE. Go to the help menu and click on the option “Install new software,” as shown in the
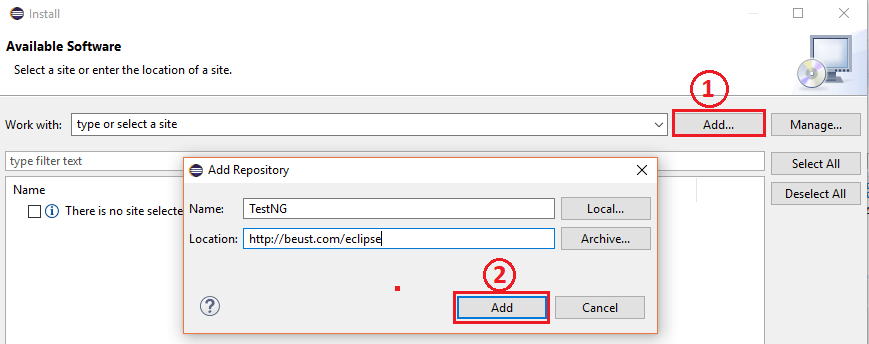
Step 2: On the new window, click on the “Add” button. Give the name, i.e., “TestNG,” and place “http://beust.com/eclipse” in the location field, then click on the “Add” button.
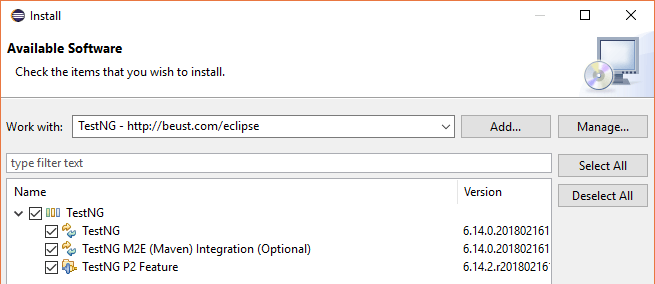
Step 3: When the search for the available software is finished, give the check mark on “TestNG” and then click on the next button.
Step 4: On the next window, it will ask to accept the terms of the license agreement. So click on “I accept the terms of the license agreement” and then click on the Finish button.
Step 5: In the process of installing the plugin, it may give a
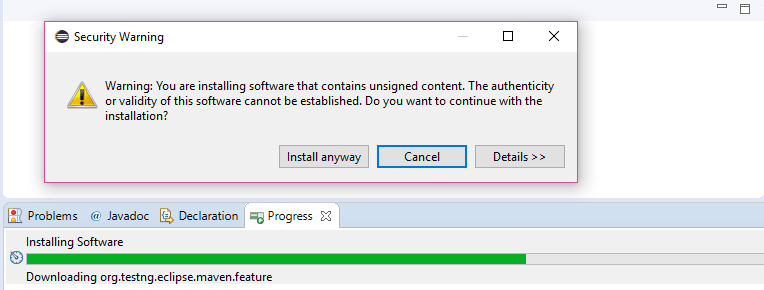
Step 6: When the installation is completed, it will ask to restart the application. Click on “Yes” to restart the Eclipse IDE.
2. Install TestNG from Eclipse Marketplace
It was a
Step 1: Go to the TestNG page on Eclipse Marketplace.
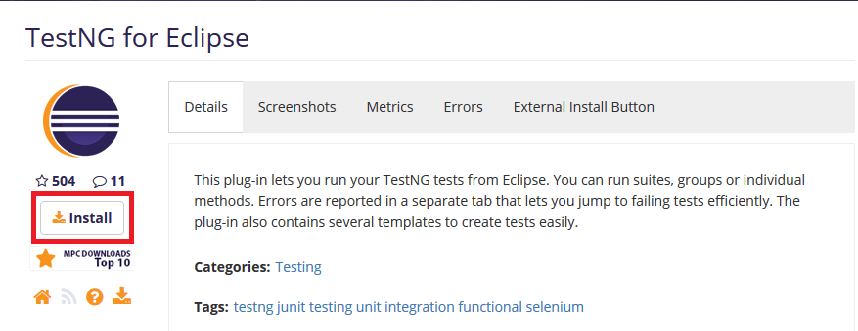
Step 2: Drag the “Install” button provided on the Eclipse Marketplace page and drop it into the running Eclipse workspace. I have also added an external install button below that is provided by Eclipse Marketplace. You can directly drag and drop the install given below.
It should require “Eclipse Marketplace Client” installed on the Eclipse IDE. To verify whether the “Eclipse Marketplace Client” is installed on the IDE, go to the help menu and observe whether the “Eclipse Marketplace” link is available as shown in the image below.
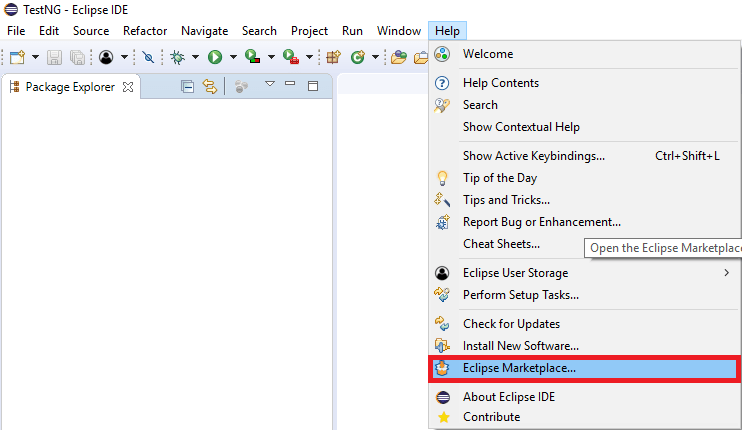
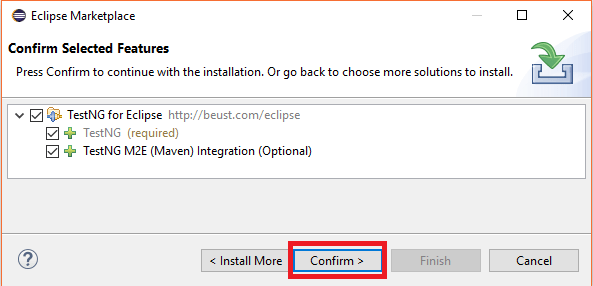
Step 3: When you have dropped the button, it will show the features that are going to be installed. Click on the
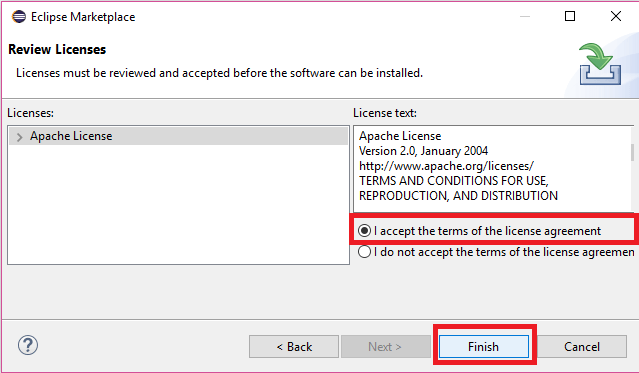
Step 4: On the next window, it will ask to accept the terms of the license agreement. So click on “I accept the terms of the license agreement” and then click on the Finish button.
Step 5: Click on “OK” to continue the installation when the security warning message is displayed. When installation finishes, click on “Yes” to restart the Eclipse IDE.


